Earlier, David Hobby (the Strobist author) wrote about one type of light--soft light. Soft light is diffused, even light with soft shadows. The other type of light is hard light. This type of light is strong and harsher shadows, and it's more obvious to tell where the light source is.
One important concept that he touches on is that hard light generally comes from small sources and soft light comes from larger sources. This makes sense. For example, if you have a bare speedlight (which only has an area of a few inches), your shadows will be much more defined compared to when using an umbrella. A more common example is when it's sunny; on bright days, the sun casts dark and sharp shadows, but on overcast days, there are very few shadows at all (which is why, if I remember correctly, photographers call clouds "nature's softbox").
One important concept that he touches on is that hard light generally comes from small sources and soft light comes from larger sources. This makes sense. For example, if you have a bare speedlight (which only has an area of a few inches), your shadows will be much more defined compared to when using an umbrella. A more common example is when it's sunny; on bright days, the sun casts dark and sharp shadows, but on overcast days, there are very few shadows at all (which is why, if I remember correctly, photographers call clouds "nature's softbox").
 My photo.
 This photo is an example of soft lighting. It was taken around noon on an overcast day, so the light was nicely diffused and even, leaving no unruly shadows across the subject's face and body.
While I'm often wary of hard light, Hobby says that a key to success is to balance the light source with ambient lighting. This will give a defined shadow area but keep detail where it's darker.
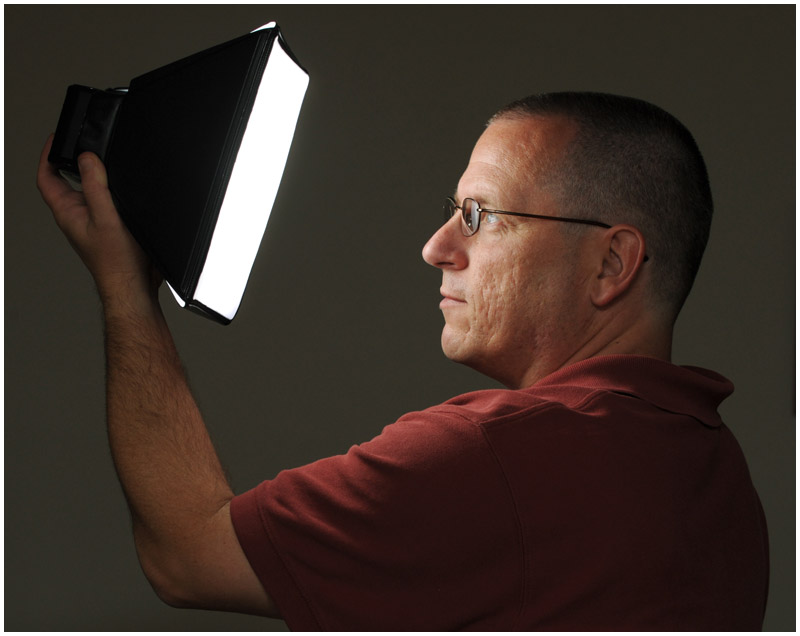 Photo by David Hobby
 Hobby continues on and talks about some more light modifiers, which include a min softbox. A mini softbox is an easy to use and portable diffuser that attaches to the head of the speedlight. This turns the hard light of a bare flash into softer light.
Balancing Flash and Ambient, Pt 1
At this point, the Strobist blog has talked about equipment and basics of light. Now it's time to get into the really good stuff: using the flash.
Hobby first mentions a couple important points:
- As long as you are at or below your camera's top "sync" speed, it doesn't matter what shutter speed you use. This is because the speedlight is pretty much instantaneous.
- Every time you take a photo with flash, you are simultaneously taking one exposure of the flash's light and one exposure of the ambient lighting. When the flash gives off a burst of light, it freezes the subject just like a fast shutter speed. The rest of the exposure time is used to take in the rest of the light in the scene.
The process for balancing flash and ambient light is quite simple:
1. Get a full ambient exposure (no flash).
2. Underexpose to give headroom for the flash's light.
3. Bring the subject back up to full exposure with the flash.
This three-step process makes flash photography seem so easy--all it is is a balancing act to get proper amount of light. It's just that now there's control over directionality and contrast.
My takeaway from today is that flash photography is both simpler and harder than it looks. On one hand, all I need to do to take a photo with flash is underexpose and add flash. On the other hand, there are many variables, such as how much flash power to have, how much contrast do I want in the shot, and where do I want the light coming from. All of this is just trial-and-error.
Total time today: 1:15. Most of this time was spent reading through the blog and looking at example photos. I also spent about ten minutes or so looking up do-it-yourself mini softbox projects that I can do to make a softbox for cheap.
 RSS Feed